HOW TO CLEAN A RUGER 10/22?
Disassembling, cleaning, and reassembling the Rugger 10/22 10-round rotary magazine is kind of straightforward, you want some right tool, some guideline concerning football game, and several minutes?
A 9/64th in. hex wrench is needed. Although gently holding the magazine body in an exceedingly holding device or clamp might create it more comfortable to figure with, no different tools are necessary. I did not want one. However, it’d facilitate some individuals.
18 Steps on How to Actually Clean a Ruger 10/22
- Step 1
Always prepare the rifle cleanup space with everything that you can need:
- Step 2
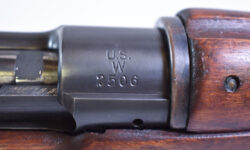
Invariably visually check the semi-auto rifle to ensure that the magazine is out of the gun and unfilled. Twitch the charging handle back and verify that the chamber is unfilled and lock around the rifle bolt for safety.
- Step 3
Loosen the front band screw and take away the front band.
- Step 4
Loosen barrel stock screw.
- Step 5
Push the safety button, so AN equal quantity of control is exposed on all sides. It is often necessary as a result of the fastidiously designed trigger housing space of the stock. [sc name=”in-content” ]
- Step 6
Swing the barrel and receiver device uphill and far from the fore-end. Take care not to lose receiver and trigger housing cross-pins which could slip out of position.
- Step 7
Place a metal cleanup coat the cleanup rod with bore cleaner on that. Then strike the barrel to the receiver. Keep in mind to get rid of the bore brush whenever before you pull out the cleanup rod. Once the cleanup rod has cleared the barrel, place the comb back on for the next run. Try this 5-8 times or till the barrel is clean of dirt, grime, and powder residue.
- Step 8
Take away the bore brush from the cleanup rod and exchange it with the covering tip. After that, place a clean, dry patch on the knowledge and run it down towards the barrel from the honker to the receiver. At the receiver, change the dirty patch with a clean one and pull it back through the barrel and out.
Do this 3-5 times. Place a clean, lubricated patch on the cleanup rod. Run the cleanup rod down the barrel up to 5 times to grease the barrel.
- Step 9
Clean the receiver and screw with a soft metal wire brush. It helps to get rid of loose dirt, grime, and powder residue.
- Step 10
Use Q-Tips soaked in a gun cleaner to wash the bolt and receiver. Use dry Q-Tips to get rid of excess cleaner. Then use Q-Tips with gun material to fill the bolt and, therefore the within the receiver. Use solely a drop or two on the Q-Tip. Could you not make it?
- Step 11
Use gun material to fill the receiver and trigger cross pins, varied pivot points within the trigger guard housing (such because the trigger pivot, hammer pivot, safety, and therefore the bolt and bolt handle.
- Step 12
Before finishing assembly of the barreled receiver to the stock, wipe down with a decent gun material all the metal elements contained at intervals in the store and outdoors of the store.
- Step 13
After the barreled receiver has been gently greased, assemble it into the store. Then insert and tighten the stock screw.
- Step 14
Replace the front band and pull the front band screw. [sc name=”in-content” ]
- Step 15
To wash the magazine, use a soft wire brush to get rid of dirt, grime, and powder residue.
- Step 16
To eradicate layers of dirt, grime, and powder residue the comb couldn’t take away, use Q-Tips with a decent gun cleaner on them. Then use dry Q-Tips to get rid of excess cleaner. Place a drop of material on all sides of the skin of the rotary magazine shaft.
- Step 17
Put AN empty, clean magazine within the magazine well and lock it in situ, and performance check the rifle.
- Step 18
When operate testing the gun, wipe down the barrel and the other places that you just touched on the gun with a clean greased rag. It is often to stop the sweat in your fingertips from oxidization any exposed elements of the rifle.
A Cleaning Note from Rugger Firearm’s Company
A comprehensive field improvement isn’t needed quite once each five hundred rounds. The primary purpose of such a modification is to get rid of powder residue from internal parts and as a rust bar process.
If a refile has been soaked or sunk in the water, if sand or alternative foreign matter of any considerable quality enters the mechanism, would functioning’s responsibility be impaired? During this case, the gun should be demolished and completely clean by a licensed smith or armor. [sc name=”in-content” ]
Conclusion
Although cleaning a rugger 10/22 is a complicated procedure, but if you can follow these simple steps for cleaning, then it becomes simple and easy for you. [sc name=”faq3questions” q1=”How To Clean a Ruger 1022?” a1=”Although gently holding the magazine body in an exceedingly holding device or..” q2=”18 Easy Steps” a2=”Invariably visually check the semi-auto rifle to ensure that the magazine is out and..” q3=”Note From Rugger Firearm’s Company” a3=”The primary purpose of such a modification is to get rid of powder residue from..” ]