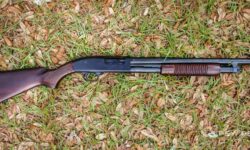
HOW TO CLEAN A SHOTGUN?
When it comes to firearm ownership, the most important rule is safety. Did you know that keeping a gun clean actually decreases the likelihood of an accidental discharge? The more accurate term is “negligent discharge,” which is entirely avoidable if all safety procedures are followed. These include the following: ensuring that all firearms are safely unloaded and cleared prior to beginning disassembly work. Conducting a safety check is always a required first step that should be repeated as a double or triple check to ensure the firearm is clear and safe.
How to Clean a Shotgun Correctly?
Knowing how to clean a gun entails more than simply maintaining an attractive firearm; it is a matter of safety. Failure to follow proper cleaning protocol can result in accidental injuries – or worse. Apart from the physical dangers, there are legal ramifications, as the firearm owner is personally liable for any injuries or damages caused by a negligent discharge.
How to properly clean a shotgun and some helpful tips
- Proper Preparation is Crucial
Prior to cleaning your gun, you should choose a clean area with plenty of workspaces. The area should be well-lit and ventilated to avoid making any mistakes or experiencing any adverse reactions to the cleaning chemicals.
Gun enthusiasts who clean their firearms on a regular basis understand that the best place to work is outside or in the garage. If cleaning your gun inside is necessary, do so near an open window. And then make sure to utilize a sturdy, clutter-free table.
- Check the Instruction Manual
The manufacturer’s manual will detail how to safely disassemble and clean your gun. The majority of manuals include colored diagrams and detailed photographs to ensure that you disassemble and reassemble your gun properly.
Are you unable to locate the manual? The Official NRA Guide to Firearms Assembly includes written and visual instructions for disassembling the majority of handguns, shotguns, and rifles. Additionally, manuals for specific models from a variety of manufacturers are available. These can be downloaded and printed for free from the manufacturers’ websites.
- You Can Start Getting to Work
Now that you’ve followed the proper safety procedures for cleaning your gun, let’s get into the details.
Diverse firearms necessitate distinct techniques. However, the following tools are necessary for the gun cleaning process:
- Cleaning rod
- Bore brush (caliber specific)
- Cleaning jags (slotted and form-fitting)
- Cleaning swab
- Mops
- Double-ended/utility brushes
- Cleaning patches (caliber specific, lint and fiber-free)
- Luster cloth/Silicone impregnated Gun and Reel Cloth
- Cotton swabs
- Bore snake
- Cleaning chemicals, including bore cleaners, action cleaners, and lubricants
- Disposable drip pan (to get residue and byproducts of the cleaning process)
How to Clean a Gun in Simple Steps
The following are the fundamental steps for cleaning firearms of all types properly and safely:
Step 1: Remove the magazine and check to ensure the firearm is not loaded.
Step 2: Clean the Chamber and Barrel
Dry brush the chamber and barrel in a chamber to muzzle direction with a copper-phosphate (or nylon) bore brush. This will dislodge and eliminate some of the bore’s large carbon and metal fouling.
On the tip of your cleaning rod, place a cleaning patch dipped in bore solvent. Then, using the cleaning patch, saturate the chamber and bore surface by pushing it through the barrel and out the other side.
Removing it will re-deposit dirt and gunk into the bore.
Allow 10-15 minutes for the cleaning solvent to degrade bore fouling.
Following that, scrub the inside of the barrel with only the bore brush. Remove any residue with a new, dry patch and continue running it through the bore until the patch comes out clean.
Utilize a pull-through tool impregnated with a light lubricant, such as a bore snake and CLP or an equivalent, to further clean and treat the bore surface against corrosion. Avoid using gun oil to lubricate the bore. Only when the bore will be stored for an extended period of time should a heavier lubricant such as Barricade be used (or equivalent). This must be cleaned out of the barrel prior to shooting the firearm.
Clean the barrel, barrel hood, barrel lug, and feed ramp’s exterior.
Step 3: Ensure that the Action is Clean and Lubricated
Cleaning and lubricating the gun’s barrel is not sufficient. Cleaning the action (slide, pump, or bolt) with a nylon utility brush, a dry cloth, and action cleaner solvent is also recommended. From the top of the frame/receiver, liberally spray the action, allowing carbon and metal debris to be washed into the drip pan. Adhere to the manufacturer’s recommendations for your specific model. Allow for drying of the cleaned sub-assemblies. Dispose of any cleaning residues properly.
Finally, using a needle applicator, apply lubricant drops precisely to the slide assembly, manufacturer-recommended lubrication points on the frame/action, and exterior of the barrel. It is critical not to over-lubricate, as this will encourage contaminant accumulation and may result in reliability issues.
Step 4: Clean the Magazines As Well
They are the source of ammunition and are responsible for a semiautomatic firearm’s proper feeding. Magazines that are reliable and clean are critical to the proper operation of a semiautomatic. They can be disassembled, cleaned, and reassembled as directed by the manufacturer. For magazine cleaning, special purpose brushes are available. Wear safety glasses and exercise caution when disassembling and reassembling magazines, as magazine followers are spring-loaded. Never clean magazines with petroleum products, as they will contaminate ammunition primers. They should never be lubricated but instead cleaned with a solvent or cleaning agent that leaves no residue.
Step 5: Start Reassembling the Firearm and Do a Functional Check
When a firearm is disassembled and reassembled, a functional check should be performed to ensure that the gun continues to operate as intended following the disassembly. During this check, the trigger mechanism, safety or safeties, slide operation, locking, magazine retention, and ejection systems are verified to function correctly. Adhere to the manufacturer’s procedure for your specific firearm and always follow gun safety rules!
Step 6: Wipe the Gun’s Exterior
After cleaning and lubricating the gun’s interior and moving parts, it’s time to clean the gun’s exterior. Again, a gun/reel cloth is ideal for this application.
These cloths are exceptionally soft and have been pre-treated with silicone lubricant. This assists in removing any remaining debris, acidic prints and provides a protective shine to your weapon.
If you do not have a silicone cloth, individual CLP wipes or a similar product will suffice. [sc name=”faq2questions” q1=”Proper Preparation is Crucial ” a1=”The area should be well-lit and ventilated to avoid making any mistakes or experiencing any…” q2=”How to Clean a Gun in Simple Steps” a2=”Step 1: Remove the magazine and check to ensure the firearm is not loaded…” ]